How To Install or Replace a Neck on a TOUGH GUN G2 Series Robotic Air-Cooled MIG Gun
Neck Removal
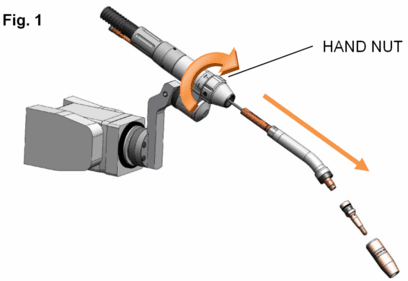
- Remove consumables. (Refer to Fig.1)
- Twist the hand nut clockwise. (Refer to Fig. 2)
- Hold the hand nut in the unlocked position while pulling the neck from the gun.
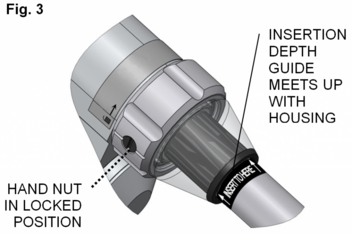
- Release the hand nut. It will return to the locked position. (Refer to Fig. 3)
Neck Replacement
NOTE: Remove consumables (retaining head, nozzle and contact tip) before installing the neck. Failure to do so will result in improper installation.

- Twist the hand nut clockwise to UNLOCK. IMPORTANT: To prevent damage to the neck, ensure that the hand nut is always in the UNLOCK position when inserting a neck.
- Insert the neck into the connector housing. IMPORTANT: The neck is fully inserted only when the neck bottoms out and the insertion depth guide (INSERT TO HERE) on the neck meets up with the connector housing.
- Release the hand nut allowing it to return to the LOCK position. IMPORTANT: Do not release the hand nut unless the neck has been fully inserted or damage to the neck may result.